 ArduinoとPC間での通信はいろんなやり方がありますが、一番基本的なのはやはりUSB接続のシリアル通信でしょう。ここでは、ArduinoとC#で通信する例を紹介します。
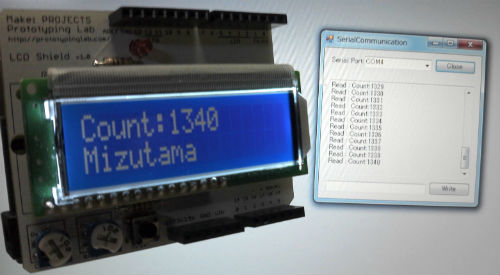
ファイル一式
https://github.com/umhr/SerialCommnunication_forArduino
Arduino側
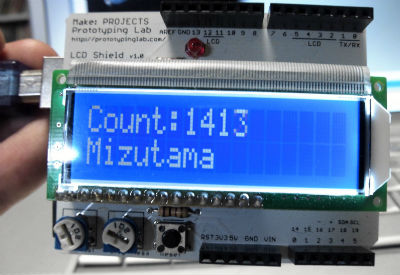
起動してから、カウントをして値を送り続けます。
受信した場合は、LCDシールド上の二行目で確認します。
シリアル通信自体は、
Serial.begin(9600);
で接続し、
あとは、
Serial.read()やSerial.print()で読み書きするだけなので、非常にシンプルな作りです。
リファレンス
Serialオブジェクト
|
1 2 3 4 5 6 7 8 9 10 11 12 13 14 15 16 17 18 19 20 21 22 23 24 25 26 27 28 29 30 31 32 33 34 35 |
#include <LiquidCrystal.h> LiquidCrystal lcd(12, 11, 5, 4, 3, 2); void setup() { lcd.begin(16, 2); // 9600Baudで通信します。 Serial.begin(9600); } void loop() { // テキストを保持します。 String text = "Count:"; text += millis()/1000; // LCDの書き込み開始位置を指定します。 lcd.setCursor(0, 0); // textをlcdに送ります。 lcd.print(text); // textをシリアル送信します。 Serial.println(text); // シリアル受信した文字列がある場合は // LCDの書き込み開始位置を二行目に指定します。 if(Serial.available() > -1){ lcd.setCursor(0, 1); } // シリアル受信した文字列がある間は繰り返し処理をします。 while (Serial.available()) { // lcdに書き込みます。 lcd.write(Serial.read()); } delay(1000); } |
C#側
接続するポートを選択し、Openボタンを押下すると通信を始めます。
受信するとログエリアに表示します。
送信するには下部のテキストエリアに入力し、Writeボタンを押下します。
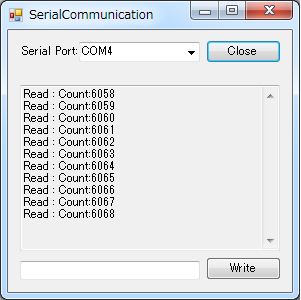
ArduinoをUSBで接続した状態で、このC#アプリを起動することを前提としています。
今回は全体の流れの見通しのよさを優先し、エラー処理は最低限にしています。
また、受信処理と、表示処理は別スレッドとなっているため、橋渡しのInvokeが必要になていることには注意が必要です。
|
1 2 3 4 5 6 7 8 9 10 11 12 13 14 15 16 17 18 19 20 21 22 23 24 25 26 27 28 29 30 31 32 33 34 35 36 37 38 39 40 41 42 43 44 45 46 47 48 49 50 51 52 53 54 55 56 57 58 59 60 61 62 63 64 65 66 67 68 69 70 71 72 73 74 75 76 77 78 79 80 81 82 83 84 85 86 87 88 89 90 91 92 93 94 95 96 97 98 99 100 101 102 103 104 105 106 107 108 109 110 111 112 113 114 115 116 117 118 119 120 121 122 123 124 125 126 127 128 129 130 131 132 133 134 135 |
using System; using System.Collections.Generic; using System.ComponentModel; using System.Data; using System.Drawing; using System.Linq; using System.Text; using System.Threading.Tasks; using System.Windows.Forms; using System.IO.Ports; namespace SerialCommnunication_CSharp { public partial class Form1 : Form { // スレッド間処理のために用意 private delegate void Delegate_write(string data); public Form1() { InitializeComponent(); setSerialComboBox(); } /****************************************************************************/ /*! * シリアルポートを選択するComboBoxを作ります。 * 接続されているポートの名前を取得し、表示します。 */ private void setSerialComboBox() { foreach (var portName in SerialPort.GetPortNames()) { portselectComboBox.Items.Add(portName); } if (portselectComboBox.Items.Count > 0) { portselectComboBox.SelectedIndex = 0; openButton.Enabled = true; } } /****************************************************************************/ /*! * openButtonが押されると実行されます。 * 接続の分岐をします。 */ private void openButton_Click(object sender, EventArgs e) { if (openButton.Text == "Open") { serialPortOpen(); openButton.Text = "Close"; } else { serialPortClose(); openButton.Text = "Open"; } } /****************************************************************************/ /*! * 接続を開始します。 */ private void serialPortOpen() { string portName = portselectComboBox.SelectedItem.ToString(); serialPort1.BaudRate = 9600; serialPort1.PortName = portName; serialPort1.Open(); writeButton.Enabled = true; } /****************************************************************************/ /*! * 接続を終了します。 */ private void serialPortClose() { serialPort1.Close(); writeButton.Enabled = false; } /****************************************************************************/ /*! * writeButtonが押されると実行されます。 * serialPort1に送信します。 */ private void writeButton_Click(object sender, EventArgs e) { String text = messageTextBox.Text; serialPort1.Write(text); //Console.WriteLine(text); // messageTextBoxをクリア messageTextBox.Text = ""; } /****************************************************************************/ /*! * serialPort1でデータを受信すると実行されます。 * スレッドが異なるので、Invokeを使う。 * http://kana-soft.com/tech/sample_0007_4.htm */ private void serialPort1_DataReceived(object sender, SerialDataReceivedEventArgs e) { // 受信したデータ string data = serialPort1.ReadLine(); // 異なるスレッドのテキストボックスに書き込む Invoke(new Delegate_write(write), new Object[] { data }); } /****************************************************************************/ /*! * logTextBoxに受信内容を書き込みます。 */ private void write(string data) { if (data != null) { logTextBox.AppendText(data + "\n"); } } /****************************************************************************/ /*! * ウィンドウが閉じられる際に実行されます。 */ private void Form1_FormClosing(object sender, FormClosingEventArgs e) { // シリアル通信していた場合は、閉じてから終了する if (serialPort1.IsOpen) { serialPort1.Close(); } } } } |
参考
C#でシリアル通信を行う
http://kana-soft.com/tech/sample_0007_4.htm
2016年7月11日追記
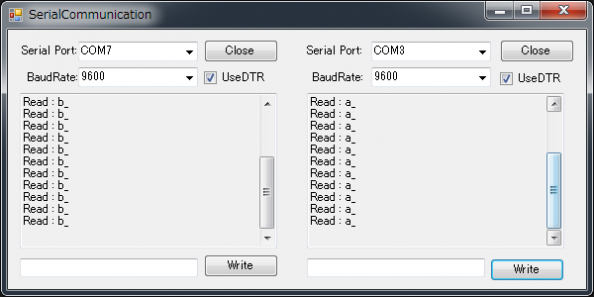
Arduino LeonardoではDTR (Data Terminal Ready) シグナルを有効にしないと、値の取得ができないので、チェックボックスを追加しました。
複数のシリアル通信に対応しました。
https://msdn.microsoft.com/ja-jp/library/system.io.ports.serialport.dtrenable(v=vs.110).aspx


1 Comment
[…] ArduinoとC#でのシリアル通信 […]