AIRKinect2_3_0.zip AIRKinect 2.xはFlashでKinectを使うためのライブラリです。スケルトンの座標はもちろんのこと、深度や人型のマスクをBitmapDataとして簡単に取得できます。
ただし、ANE(AIR Native Extensions)を使っているので、設定に若干手間が掛かります。ライブラリ公開サイトには比較的丁寧な設定方法の説明がありますが、開発者がFlash Builderを用いているためか、2.xでのFlashDevelopでの設定例がありません。
ここでは、FlashDevelopでの設定手順を紹介します。なお、FlashDevelopやKinect、AIRKinect自体の説明はしません。
◆準備
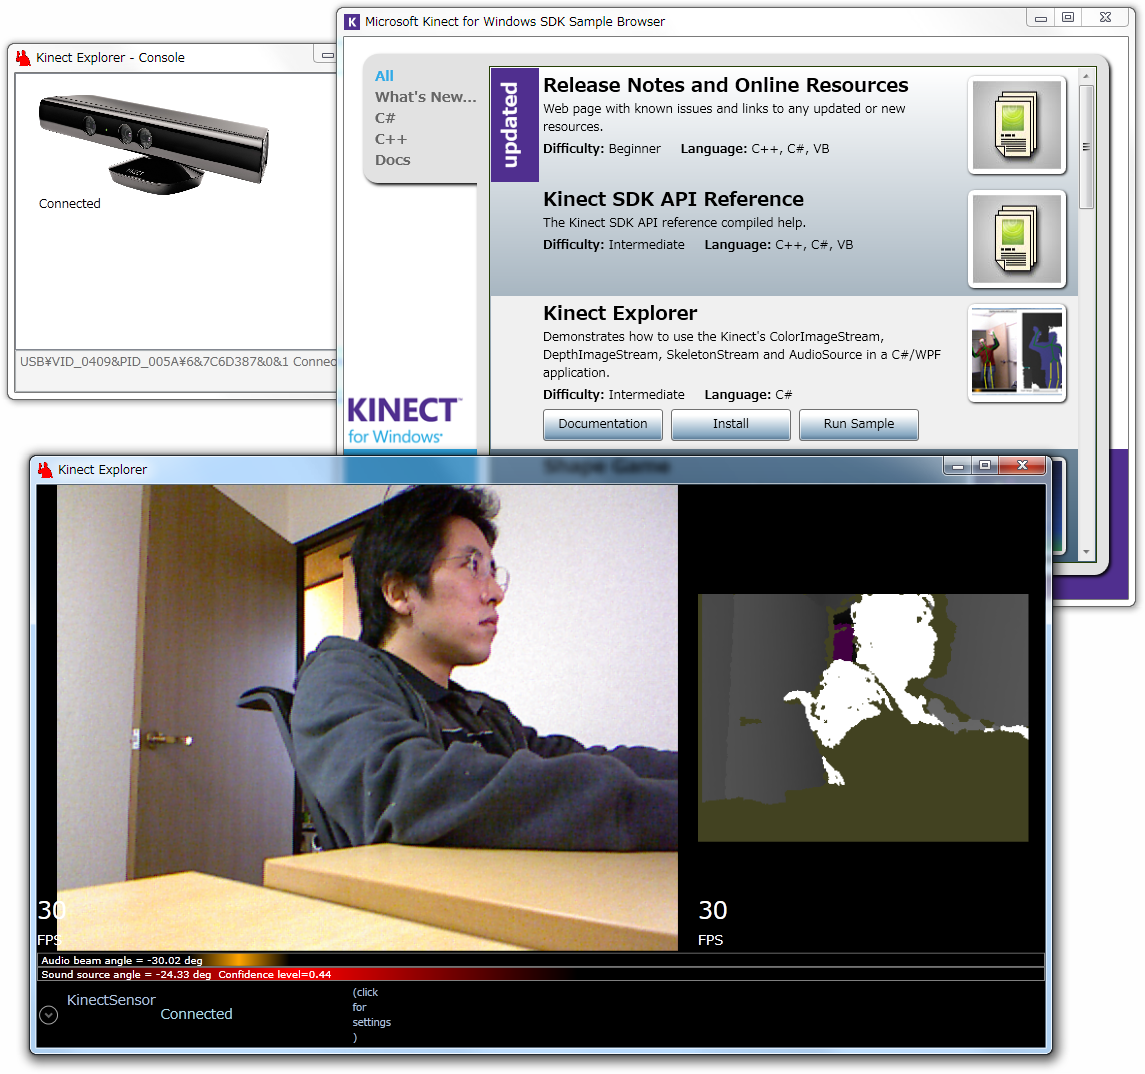
・Kinect for Windows SDK
ダウンロード&インストールする。
http://www.microsoft.com/en-us/kinectforwindows/develop/overview.aspx
本エントリー投稿時最新版は1.0.3.190
2013/5/15追記
最新版のダウンロードページが変更されている。
http://www.microsoft.com/en-us/kinectforwindows/develop/developer-downloads.aspx
2013/4/6追記
AIRKinect2.3.0、KinectSDK-v1.7、AIR3.6でも、ほぼ同じ手順で利用できることを確認しました。
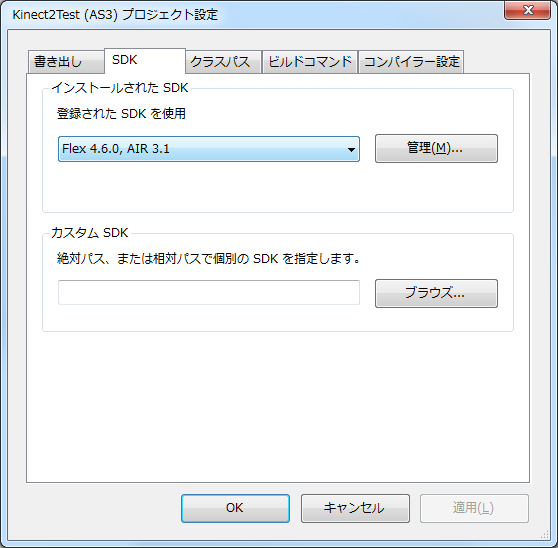
・FlexSDK 4.6
ANEは4.6からの機能なので、該当バージョン以上を使用する。
http://www.adobe.com/devnet/flex/flex-sdk-download.html
・AIRKinect 2.x
ダウンロードする。
http://as3nui.github.com/airkinect-2-core/
・注意
KinectはWindow 7以降でないと使えません。
Kinect for XBOXでも、動作確認等はできます。
Kinect SDK Beta(1.0.0.45以下)とは同居できません。
AIRKinect 2.xは1.xとは互換性がありません。
◆手順ムービー
詳細を見る場合は高画質版をどうぞ
http://youtu.be/A7vUyvTrDBQ?hd=1
以下、上記ムービーの手順を説明しています。
◆プロジェクトを作る
新規プロジェクトウィンドウを出して、「AIR AS3 Projector」を選びます。
ここでは「AIRKinectProject」にしました。
◆ライブラリの認識
ダウンロードしたライブラリの中から、「airkinect-2-core.swc」をlibの中に入れて、ライブラリに追加します。
プロジェクトディレクトリ下に「extension」ディレクトリ、さらにその下に、「release」と「debug」ディレクトリを作ります。
releaseとdebug両方のディレクトリに「airkinect-2-core-mssdk.ane」を追加します。
debugディレクトリのほうは、拡張子をzipにして、解凍します。
そして解凍したディレクトリを「airkinect-2-core-mssdk.ane」という名前にします。
airkinect-2-core-mssdk.zipはいらないので、削除します。
2013/4/6追記(AIRKinect2.3.0で確認)
本エントリー公開後、swcでのファイル配布はしなくなったようです。配布物のsrc内のcom以下のファイルを自分で作ったプロジェクトのsrc以下に丸ごとコピーすれば使えます。
一応、swc化したものを置いておきます。コードのライセンスは元サイトでご確認ください。
AIRKinect2_3_0.zip
2013/5/1追記
FlashDevelop4.4.0ではPackageApp.batの修正も必要です。
上のムービーにはありませんが、下記に説明の追加をしています。
◆Main.asを記述
次のコードを記述します。
2013/4/6追記(AIRKinect2.3.0で確認)
depthPositionがpositionになってたので修正しました。
|
1 2 3 4 5 6 7 8 9 10 11 12 13 14 15 16 17 18 19 20 21 22 23 24 25 26 27 28 29 30 31 32 33 34 35 36 37 38 39 40 41 42 43 44 45 46 47 48 49 50 51 52 53 54 55 56 57 58 59 60 61 62 63 64 65 66 67 |
package { import com.as3nui.nativeExtensions.air.kinect.data.SkeletonJoint; import com.as3nui.nativeExtensions.air.kinect.data.User; import com.as3nui.nativeExtensions.air.kinect.events.CameraImageEvent; import com.as3nui.nativeExtensions.air.kinect.events.UserEvent; import com.as3nui.nativeExtensions.air.kinect.Kinect; import com.as3nui.nativeExtensions.air.kinect.KinectSettings; import flash.display.Bitmap; import flash.display.Sprite; import flash.display.StageAlign; import flash.display.StageScaleMode; import flash.events.Event; public class Main extends Sprite { private var kinect:Kinect; private var bmp:Bitmap; private var skeletonContainer:Sprite = new Sprite(); public function Main() { stage.align = StageAlign.TOP_LEFT; stage.scaleMode = StageScaleMode.NO_SCALE; stage.nativeWindow.visible = true; if(Kinect.isSupported()) { bmp = new Bitmap(); addChild(bmp); kinect = Kinect.getDevice(); kinect.addEventListener(CameraImageEvent.DEPTH_IMAGE_UPDATE, kinect_depthImageUpdate); var settings:KinectSettings = new KinectSettings(); settings.depthEnabled = true; settings.userMaskEnabled = true; settings.skeletonEnabled = true; kinect.start(settings); addChild(skeletonContainer); addEventListener(Event.ENTER_FRAME, enterFrame); } } private function kinect_usersMaskImageUpdate(event:UserEvent):void { } private function enterFrame(e:Event):void { skeletonContainer.graphics.clear(); for each(var user:User in kinect.usersWithSkeleton) { for each( var joint:SkeletonJoint in user.skeletonJoints) { skeletonContainer.graphics.beginFill(0xFF0000); //skeletonContainer.graphics.drawCircle(joint.depthPosition.x, joint.depthPosition.y, 3); skeletonContainer.graphics.drawCircle(joint.position.depth.x, joint.position.depth.y, 3); skeletonContainer.graphics.endFill(); } } } private function kinect_depthImageUpdate(event:CameraImageEvent):void { bmp.bitmapData = event.imageData; } } } |
◆application.xmlの記述
23~27行目を追加します。
|
1 2 3 4 5 6 7 8 9 10 11 12 13 14 15 16 17 18 19 20 21 22 23 24 25 26 27 28 29 30 31 32 |
<?xml version="1.0" encoding="utf-8" ?> <application xmlns="http://ns.adobe.com/air/application/3.1"> <id>Kinect2Test</id> <versionNumber>1.0</versionNumber> <filename>Kinect2Test</filename> <name>Kinect2Test</name> <description></description> <copyright></copyright> <initialWindow> <title>Kinect2Test</title> <content>Kinect2Test.swf</content> <systemChrome>standard</systemChrome> <transparent>false</transparent> <visible>true</visible> <minimizable>true</minimizable> <maximizable>true</maximizable> <resizable>true</resizable> </initialWindow> <supportedProfiles>extendedDesktop</supportedProfiles> <extensions> <extensionID>com.as3nui.nativeExtensions.air.kinect</extensionID> </extensions> <!-- More options: http://livedocs.adobe.com/flex/3/html/File_formats_1.html#1043413 --> </application> |
◆Run.batの記述
10行目に
|
10 |
-extdir extension/debug/ |
を追加します。
|
1 2 3 4 5 6 7 8 9 10 11 12 13 14 15 16 17 |
@echo off set PAUSE_ERRORS=1 call bat\SetupSDK.bat call bat\SetupApplication.bat echo. echo Starting AIR Debug Launcher... echo. adl "%APP_XML%" "%APP_DIR%" -extdir extension/debug/ if errorlevel 1 goto error goto end :error pause :end |
◆動作確認
以上でデバッグは出来るようになっているはずです。
動かなければ、Flex SDK 4.6以上であることを確認してください。
◆bat/Packager.batの記述
6行目の拡張子部分をexeにし、
11行目を次のように書き換えます。
|
11 |
call adt -package -XnoAneValidate -tsa none %OPTIONS% %SIGNING_OPTIONS% -target native %OUTPUT% %APP_XML% %FILE_OR_DIR% -extdir extension/release/ |
|
1 2 3 4 5 6 7 8 9 10 11 12 13 14 15 16 17 18 19 20 21 22 23 24 25 26 27 28 29 30 31 32 33 34 35 36 |
@echo off if not exist %CERT_FILE% goto certificate :: AIR output if not exist %AIR_PATH% md %AIR_PATH% set OUTPUT=%AIR_PATH%\%AIR_NAME%%AIR_TARGET%.exe :: Package echo. echo Packaging %AIR_NAME%%AIR_TARGET%.air using certificate %CERT_FILE%... call adt -package -XnoAneValidate -tsa none %OPTIONS% %SIGNING_OPTIONS% -target native %OUTPUT% %APP_XML% %FILE_OR_DIR% -extdir extension/release/ if errorlevel 1 goto failed goto end :certificate echo. echo Certificate not found: %CERT_FILE% echo. echo Troubleshooting: echo - generate a default certificate using 'bat\CreateCertificate.bat' echo. if %PAUSE_ERRORS%==1 pause exit :failed echo AIR setup creation FAILED. echo. echo Troubleshooting: echo - did you build your project in FlashDevelop? echo - verify AIR SDK target version in %APP_XML% echo. if %PAUSE_ERRORS%==1 pause exit :end echo. |
◆PackageApp.batの記述(2013/5/1追記)
8行目に「-tsa none」の記述がある場合は削除します。
|
8 |
set OPTIONS=-tsa none |
|
1 2 3 4 5 6 7 8 9 10 11 |
@echo off set PAUSE_ERRORS=1 call bat\SetupSDK.bat call bat\SetupApplication.bat set AIR_TARGET= ::set AIR_TARGET=-captive-runtime set OPTIONS= call bat\Packager.bat pause |
◆開発用証明書の P12 ファイルの作成
bat/CreateCertificate.batを実行します。
「AIRKinectProject.p12」ファイルが生成されます。
◆AIRアプリケーションファイルの生成
PackageApp.batの実行をします。
airディレクトリ内に、「AIRKinectProject.exe」が生成されます。
実行すると、インストールされます。
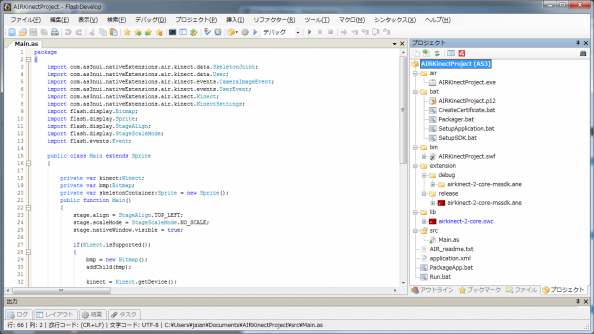
◆ファイル構成
◆生成されたexe
2012/5/16追記
同じ手順で、
・Windows Vista
・XTION PRO LIVE
・OpenNI
の組み合わせでの動作確認ができました。
「airkinect-2-core-mssdk.ane」の部分は「airkinect-2-core-openni.ane」を使います。


1 Comment
[…] ntain tutorial video. http://www.mztm.jp/2012/05/02/flashdevelopairkinect-2-x/ (As of May 09, 2012) […]